Decide what the outline must explain
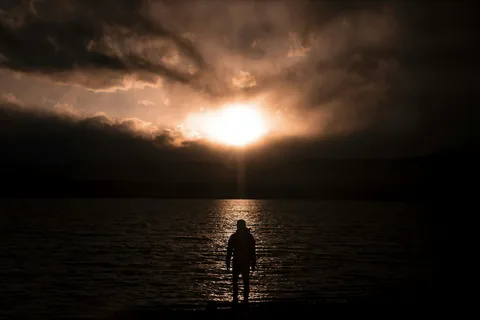
A silhouette replaces much of a subject’s surface detail with an outline. Before changing exposure, decide what that outline needs to communicate: a person reaching upward, a palm against the sky or two figures facing one another. If the action is unclear in a small preview, making the subject darker will not necessarily help. Look first for a recognizable contour and a background that gives it room. Nikon’s guidance identifies backlighting and exposing for the background as the basic technique; the composition still has to make that contrast useful.
Find contrast that is already present
Choose a brighter background behind a comparatively shaded subject. A sunset is one option, but a bright doorway or window can create a similar relationship without a colorful sky. Move until the intended outline falls against the cleanest part of that background. If the subject and background receive similar light, lowering exposure darkens both; it does not create a large tonal separation by itself. Return at a different time or choose another angle when the available light does not support the photograph you imagined.

Leave small gaps where the action needs them
An arm pressed against a torso can disappear into one solid mass. Two people standing shoulder to shoulder may become a single ambiguous shape. For a posed photograph, ask for a small separation of hands, elbows or bodies, then check the actual camera view. A side profile can make a face more recognizable than a frontal view without visible features. For unposed scenes, wait for the moment when the shapes separate naturally. Do not assume that every gap needs to be large; a narrow strip of bright background may be enough.
Move the horizon away from the important contour
Change camera height and watch where the ground, waterline or roof edge crosses the subject. A dark horizon through someone’s shoulders can erase the very shape you need. A lower viewpoint may put more of a figure against the sky, while a small sideways step can move a trunk away from another tree. In the licensed palm photograph, the fronds and trunks provide distinct outlines against changing sky color. Use it to study separation, not to infer the photographer’s exposure settings or to promise the same result in different light.
Expose for the bright area that matters
Set an exposure that preserves the background detail important to the picture, then inspect the result. In an automatic exposure mode, negative exposure compensation may help keep the camera from brightening a dark foreground, but the required amount depends on the scene and metering. Use the histogram and highlight warning as checks rather than aiming for a universal number. A small bright light source may clip while the rest of the background remains useful. Decide consciously which detail can be lost; do not judge exposure from screen brightness alone.

Keep focus and movement under control
Place focus on the subject’s edge when the autofocus system can distinguish it. If it hunts, use an appropriate smaller focus area or manual focus with magnified checking. Choose a shutter speed that handles the subject’s movement: a still tree and a person gesturing into the wind have different demands. A dark subject can still have a blurred edge. Make a short sequence and inspect the contour at a useful magnification, especially around hands and faces, before assuming that a dramatic-looking thumbnail is technically successful.
Edit for clarity without inventing the scene
Try a restrained tonal adjustment that preserves the background and strengthens the outline, then compare it with the original. Complete black is a creative choice, not a requirement; a little visible detail can help explain a gesture. Watch for halos and harsh color transitions after aggressive contrast changes. Our three credited photographs are licensed examples of silhouettes, not a before-and-after series or images made with a shared recipe. Finish your own exercise by choosing the frame with the clearest action and recording which change in position made the greatest difference.